The game presents six arenas with different terrain and zone rewards: Indigo Stadium, Viridian Grove, Cinder Crater, Azure Coast, Celestial Ruins, and Frostpeak Summit. The source page describes the reward for contesting each zone, but a list of rewards does not tell you how to reach the zone safely or what to do when the opponent gets there first. This guide turns each battlefield into a sequence of visible decisions. The route suggestions are editorial practice plans. The live arena and current game rules remain the authority for exact obstacle placement, timing, and reward behavior.
An arena matters because terrain changes the shape of every move. A projectile that works in a clear lane can be blocked or avoided when a piece of cover interrupts it. A short-range attack that feels dangerous in open space may become practical when you can emerge from behind an obstacle. A dodge that escapes one threat can carry you into another lane. The zone reward adds an incentive to move, but it does not cancel these positional costs. Good arena play is the skill of asking whether control of a space is worth the path you must take to claim it.
A map-reading routine for every match
Use the first few seconds of a match to locate three things: the nearest safe object or boundary, a route to the center that is not a straight charge, and an exit from the zone after you contest it. You do not need a perfect mental map. You need enough information to avoid making your first defensive decision after you are already exposed. On a new map, move around the edge once in a low-pressure Quick Battle and watch how the opponent follows. A map that looked symmetrical on the selection screen may feel very different depending on where you stand and face.
Name a home position: a square or region where your creature's current moves are easy to aim and where at least one retreat route is visible. Then identify the decision line: the boundary you will cross only when the opponent has used a move, moved away, or given you a clear lane. The line can be a cover corner, a change in floor texture, or your own imagined midpoint. These simple landmarks make your approach deliberate. They also provide useful notes after a loss. “I crossed the line before the opponent committed” is a correction you can apply; “the arena felt hard” is not.
Zone control is not the same as standing in the zone at all times. Sometimes you should threaten the reward while keeping the opponent between you and a safe exit. Sometimes you should concede a reward to preserve health and take a better exchange later. Sometimes a teammate switch is the cleanest way to contest a new angle. Notice whether the opponent is looking at the zone or looking at you. If it is focused on the reward, you may gain a clearer attack. If it is focused on your creature, a direct run to the zone may become predictable. These are observation prompts, not fixed rules that guarantee an outcome.
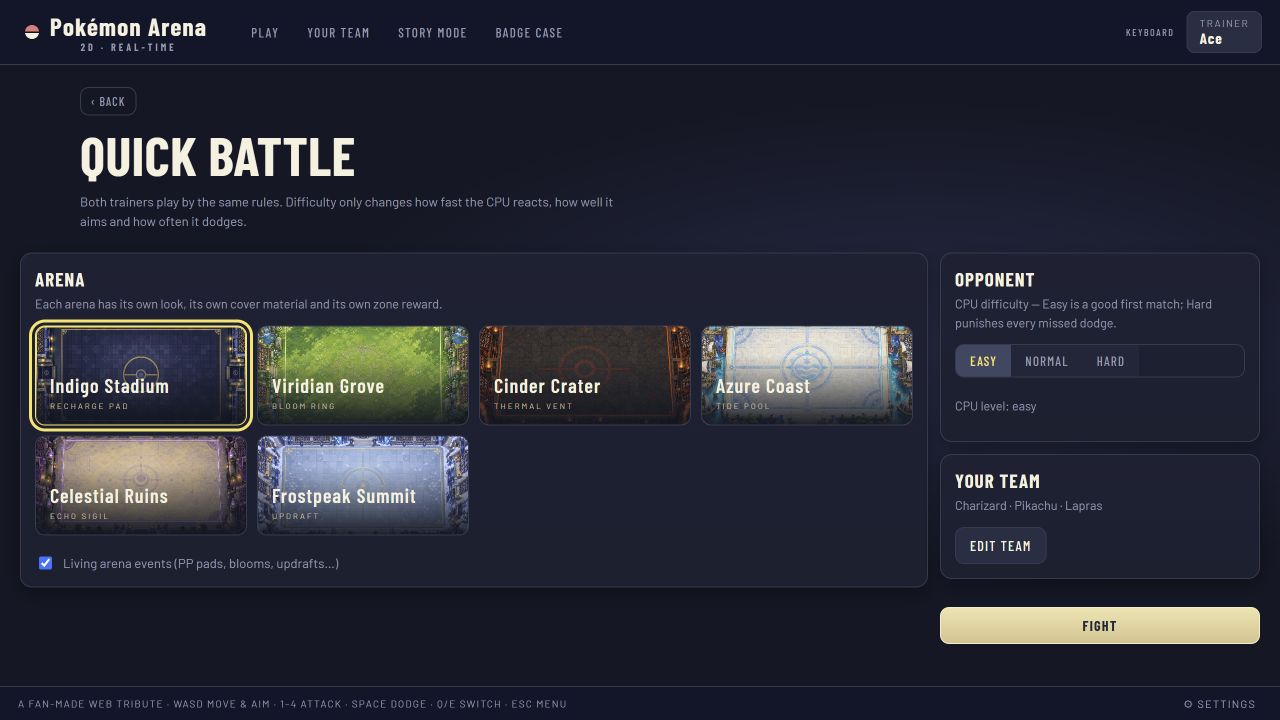
Indigo Stadium: plan for the PP refill
The source game lists Indigo Stadium as a metal arena whose zone refills PP. PP is valuable because it permits more actions later, but walking into a bad position to receive it can cost more than the resource is worth. Your first plan is to observe the clear lanes from the starting side. Pick one path that lets you approach without staying in a straight line of attack for the entire trip. If the opponent holds the center, test one attack from the edge of your comfortable range before committing to the zone. That attack may force movement or reveal a recovery window.
An effective practice round in Indigo Stadium focuses on spending and replenishing rather than hoarding. Use one move with a clear purpose, check the visible PP state, then decide whether a refill is relevant. If you are already comfortable on resources, do not give up cover solely because a reward is available. If you are short on PP and the opponent has backed away, the zone becomes a more meaningful objective. This relationship between need and risk is the point of the map exercise.
The arena can also teach you to exit after collecting a reward. Mark a path out before entering. If you stand still after the refill, the opponent may use the time to line up an attack. Move back toward a position where your restored resource can be spent productively. In review, ask two questions: Did I collect the refill while the opponent could punish me? Did I convert the refill into a better exchange, or did I merely raise a number on the HUD? The second question separates useful resource control from reward chasing.
For a trio, consider an opener whose moves you understand well enough to manage PP intentionally. Keep a second member available for an opponent that wins the central lane. A switch can change your angle, but it should not be a reflex after every blocked move. In a controlled trial, play three rounds: one where you ignore the zone, one where you contest it at the first safe opportunity, and one where you wait until PP is actually low. Compare exposure and decision quality, not only wins. This makes the arena's specific reward teach a broader skill.
Viridian Grove: use the heal without overchasing
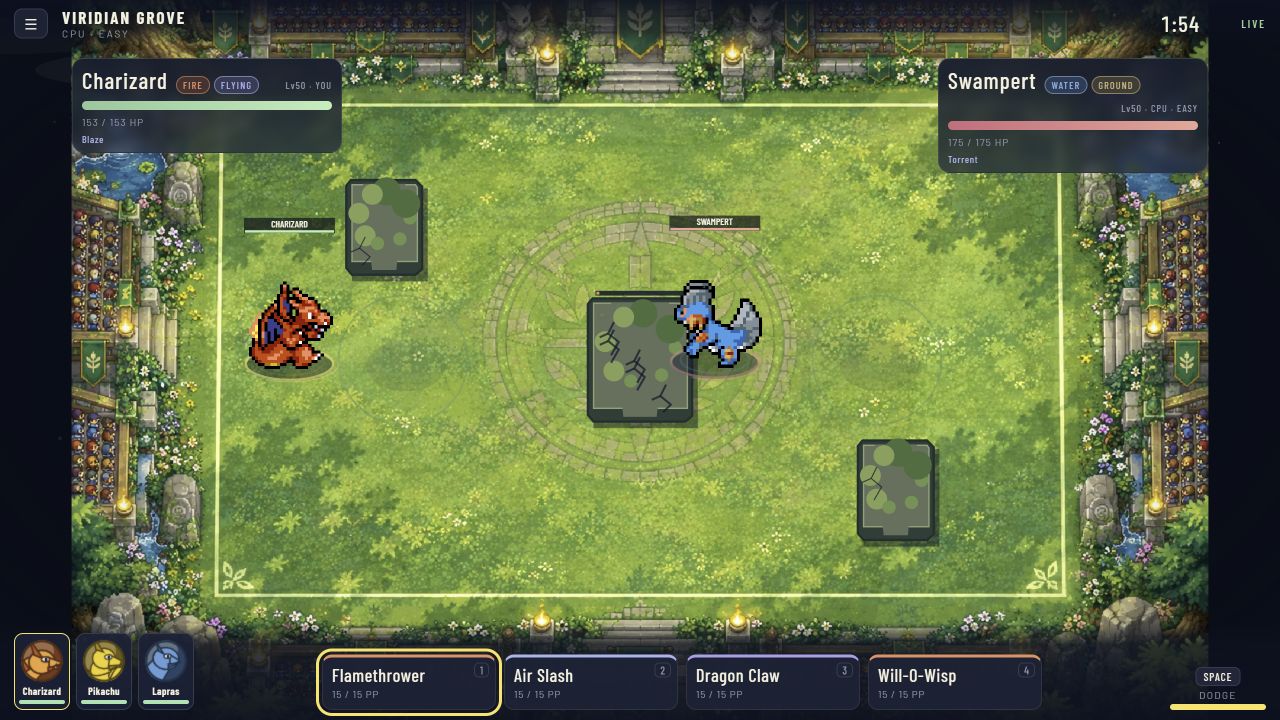
Viridian Grove is described as a wood arena with a healing zone. The live battle screenshot on this site shows combat there, including characters, cover, and the HUD. The presence of healing changes the incentives of a low-health round, but it does not make a dangerous trip harmless. Before you chase the reward, check whether you have a route that keeps you out of a clean attack lane. If the opponent is between you and the zone, consider making it move first. A short threat from a safer square may create the opening you need.
Healing is most useful when it supports a plan for the next exchange. A player may get the reward and then immediately return to the same bad position, effectively donating the recovered health. Instead, name the position you will occupy after the heal. Can you reach cover? Can you force the opponent to turn? Is a switch safer after leaving the zone? A little preparation makes the reward more than a temporary increase in the health bar.
Viridian Grove is a suitable early practice map because the reward is easy to understand. Try an exercise in which your objective is not to win but to make one careful visit to the healing area. Approach once from the left and once from the right in separate rounds. Notice which side gives you a clear view of your opponent and which side leaves your back exposed. If the live map changes, repeat the analysis rather than assuming the old route remains correct. The skill is reading the path, not memorizing a coordinate.
When defending against a player or CPU attracted to healing, avoid staring only at the zone. Watch the approach lane. The opponent's need for health can make its movement more predictable, but a rush toward the zone might also be bait for an attack as you follow. Keep an exit and preserve your dodge for a visible threat. If you use a teammate switch to contest the heal, do it from a position where the arriving creature is not already under the same pressure. After the match, note whether the healing zone changed the result or merely prolonged a pattern that needed a different positioning choice.
Cinder Crater: spend the dodge refresh wisely
Cinder Crater is listed as a basalt arena whose zone refreshes dodge. This reward invites a more aggressive pattern: use dodge to avoid a real threat, then contest the refresh so that your defensive option returns sooner. The tempting mistake is to dodge casually on the way in because the zone might restore it. If you fail to reach the zone or arrive while the opponent is ready, you have spent the tool you needed most. Treat the refresh as a possible extension to a safe sequence, not as permission to ignore the cost of entry.
Start by practicing what triggers your dodge. Choose one visible attack cue or one clear moment of being trapped. Do not press dodge merely because an opponent comes closer. Once you know why you used it, assess whether the zone is available. If the opponent controls the route, backing away may be the better response, even though a refresh is waiting. A resource only helps if you can acquire it without surrendering more than it restores.
The arena's terrain can change the value of a dodge direction. A move that avoids a projectile in open space may place you against a wall or obstacle here. Before the exchange begins, pick an escape direction that leaves a second choice. After dodging, briefly reassess facing; your movement may have changed the angle for the next attack. This is a place to practice the full cycle of defense, position, and counterattack. A successful dodge is the beginning of a decision, not the end of it.
For an experiment, run three rounds with the same team. In the first, deliberately avoid using dodge unless the threat is unmistakable. In the second, attempt to use one dodge and then collect the zone reward. In the third, ignore the refresh when the approach looks unsafe. The comparison will show when the map's special mechanic supports your plan and when it distracts you. Keep notes about the opponent's location at the moment you commit. The lesson is transferable to any objective that restores a resource after you take a risk.
Azure Coast: treat the cure as a situational objective
The source page describes Azure Coast as a sandstone arena whose zone cures burn or poison. A cure is highly relevant when a status effect is active and far less urgent when it is not. That simple distinction should shape your route. Do not run through an exposed lane for a cure you do not need. Conversely, when a status effect is eroding your ability to sustain a fight, the zone may justify changing your normal path. The value of the objective depends on the state of the match, not on its presence on the map.
Watch the HUD and visual effects rather than guessing whether a status is active. If you cannot tell, pause after the match and inspect the game's own help or settings. When you decide to contest the zone, first ask how the opponent can punish the approach. Is it waiting in a direct lane? Is there cover you can use to move in two short steps? Can a teammate create pressure from another angle? These questions keep the cure from becoming a predictable destination that the opponent can exploit.
Azure Coast is a useful map for practicing adaptive priorities. Begin a round with a normal combat plan. If a status appears, reassess. You may still choose to attack or switch before seeking the cure, especially if the opponent is blocking the route. The point is to make a decision with the new information rather than mechanically following an opening plan. If no status appears, focus on positioning and do not force a visit to the reward area just to feel that you used the arena.
In review, separate the status effect from the damage you took while pursuing the cure. A cure may succeed, yet the trip may still be poor if it leaves you with much less health or no escape. On the other hand, surrendering a small amount of position to clear a lasting effect might be sensible. Record what you saw: the status indicator, your route, the opponent's response, and the next exchange. Avoid making claims about exact tick damage or duration unless the live game displays them. The purpose of the exercise is to make status management visible and deliberate.
Celestial Ruins: turn cooldown reduction into tempo
Celestial Ruins is a stone arena with a cooldown reduction reward. Cooldown relief matters when you have moves you intend to use again soon, but the reward is not an automatic invitation to press every button. First identify which move currently limits your plan. Perhaps you need a defensive option, or perhaps an attack is the only reliable way to challenge the opponent's position. If that move is ready already, you can delay the zone attempt and preserve a safer lane. If it is unavailable and the route is open, the zone can help you regain tempo.
Try a two-step planning habit. Before entering the reward area, say which action you want afterward. Then name the position where that action can land safely. If you cannot name either, you may be pursuing a timer change with no conversion plan. After collecting the reward, do not stand in the center waiting for the opponent. Move to the attack angle or retreat path you chose. A reduction in cooldowns is useful because it changes your next decision, not because it appears as a positive icon.
This arena also invites patience around cover. Stone obstacles can create short windows when a target crosses a gap. Test a single move through one gap rather than firing repeatedly into a blocked lane. If the move enters cooldown, you can consider the zone as a way to prepare another attempt. But if you must expose yourself to reach it, compare that cost with simply waiting in a safe place. The better decision depends on opponent pressure and the clock. The source page states the zone reward; your own observations must determine when collecting it actually helps.
Use a repeatable practice sequence in Quick Battle. Pick one move you can aim consistently. Use it once, reposition, check its availability, then decide whether the zone changes your next useful action. Repeat this three times. The aim is to connect cooldown knowledge to movement. Players often notice an ability becoming ready but do not prepare an angle for it. Celestial Ruins can train you to plan the landing position while the ability is still unavailable.
Frostpeak Summit: speed needs a destination
Frostpeak Summit is listed as an ice arena whose zone grants a speed boost. More speed can help you cross a lane, escape a threat, or reach an angle before the opponent adapts. It can also carry you too far, especially when you are adjusting to the control feel or playing on touch. Decide why you want the boost before collecting it. “Reach the safe side of cover” and “circle to an attack lane” are reasons. “Move faster because faster is always better” is not a plan.
Practice a route at normal speed first. Trace the path from your start to the zone and out again, noting where you need to turn. Then collect the reward and run the same route, adjusting your input earlier if necessary. This shows whether the increased speed changes your stopping distance or makes your aim harder. If it does, temporarily simplify your attacks. You can use the boost for repositioning while keeping the actual attack sequence slow and deliberate.
Against an opponent with the boost, avoid chasing its sprite in a straight line. Watch the likely destination and claim a position that limits its useful routes. This is especially important near an arena edge, where faster movement can create a sudden turn or a trap. Save dodge for a clear threat rather than trying to match every movement with a reaction. If you lose track of the opponent, reestablish orientation before launching a move. The extra speed changes the pace, but the fundamentals of facing, cover, and recovery still apply.
For a team trial, compare a creature you can steer precisely with one whose moves are easier for you to execute while moving. Test both after the speed boost and note which one uses the extra mobility without losing aim. The answer may differ between keyboard and touch controls. If the boost feels hard to manage on a small screen, choose safer objectives or play in a full tab with more visible arena space. The arena rewards movement, but the reward should make your next action clearer rather than more frantic.
Compare reward value across the six arenas
The six rewards ask different questions. Indigo Stadium asks whether you need more PP. Viridian Grove asks whether a heal can be collected and converted. Cinder Crater asks whether a dodge refresh supports a safe defensive cycle. Azure Coast asks whether a status cure matters right now. Celestial Ruins asks whether cooldown reduction changes the next useful action. Frostpeak Summit asks where additional speed should take you. The underlying method is the same: identify your need, estimate the route's exposure, and name the action that follows the reward.
Do not compare rewards as if they had a single permanent ranking. A heal can be decisive at low health and irrelevant at full health. A PP refill can reopen your options after a resource-heavy exchange but may be a distraction while your attacks are already available. A speed boost can be excellent for a player with precise movement and awkward for somebody still learning the controls. Even in the same match, the value of a zone can change as health, resources, and the clock change.
When you lose on an arena, write down which of three problems occurred: you did not know a safe route, you did not know when the reward mattered, or you did not know what to do after collecting it. Each problem has a separate drill. Walk the route in a calmer battle, compare the reward with your current HUD state, or plan the post-reward position before entering. This diagnostic approach helps you improve without memorizing an oversimplified “best arena” answer. The map is a set of choices you can learn to read.